Por qué el mantenimiento de las empacadoras de ensilaje es más exigente que el de las empacadoras de heno.
Comprender el entorno antes de establecer el cronograma.
Cada intervalo de mantenimiento en un empacadora de ensilaje Es necesario comprender el contexto de lo que la máquina experimenta realmente durante la operación de ensilaje. El cultivo con un contenido de humedad de 50–65% libera jugo vegetal de forma continua durante todo el ciclo de empacado: un líquido ácido y rico en minerales que se deposita en todas las superficies internas, penetra en los sellos de los cojinetes y comienza a corroer los componentes metálicos ferrosos desde el momento en que entra en contacto. A diferencia del heno seco, que deja pocos residuos y presenta un riesgo mínimo de corrosión, el jugo del cultivo de ensilaje es activamente hostil para el acero sin protección, los bujes de bronce y los compuestos de caucho. Esta no es una diferencia marginal; es la razón por la que los programas de mantenimiento de las empacadoras de ensilaje deben ser fundamentalmente diferentes de los aplicados a las empacadoras de heno, y no simplemente versiones más frecuentes de las mismas tareas.
El factor peso agrava aún más esta situación. Una paca de ensilaje de la clase de cámara de 1,25 m suele pesar entre 30 y 451 TP3T más que una paca de heno equivalente, lo que significa que cada componente mecánico (ejes de transmisión del recogedor, rodillos de la cámara de empacado, tensores de correa, líneas de transmisión de la toma de fuerza) opera bajo una carga sostenida proporcionalmente mayor. La vida útil de los cojinetes se acorta, la tasa de estiramiento de la correa es mayor y la protección de los pernos de corte se prueba con mayor frecuencia. Un programa de mantenimiento calibrado para heno dará lugar a un mantenimiento insuficiente de estos componentes en el uso para ensilaje, y la falta de mantenimiento acumulada se manifiesta como fallas inesperadas a mitad de temporada en el peor momento posible.
La lista de verificación de esta guía está estructurada en torno a tres fases de mantenimiento: pretemporada (preparación antes del primer corte), en temporada (tareas diarias y semanales durante las campañas activas de ensilaje), y postemporada (Preparación para el almacenamiento al final de la temporada). Cada fase tiene un propósito distinto. El trabajo previo a la temporada identifica el desgaste antes de que cause fallas en el campo. El trabajo durante la temporada evita que los problemas pequeños se conviertan en grandes. El trabajo posterior a la temporada protege la máquina de la corrosión fuera de temporada que hace que la siguiente inspección previa a la temporada sea más extensa de lo que debería ser. Para conocer la gama completa de máquinas empacadoras de ensilaje Disponible en Ever-power. Visite nuestras páginas de productos.
Lista de verificación de pretemporada: Preparación antes del primer corte
Todo lo que debe hacerse antes de que la PTO se ponga en marcha por primera vez.
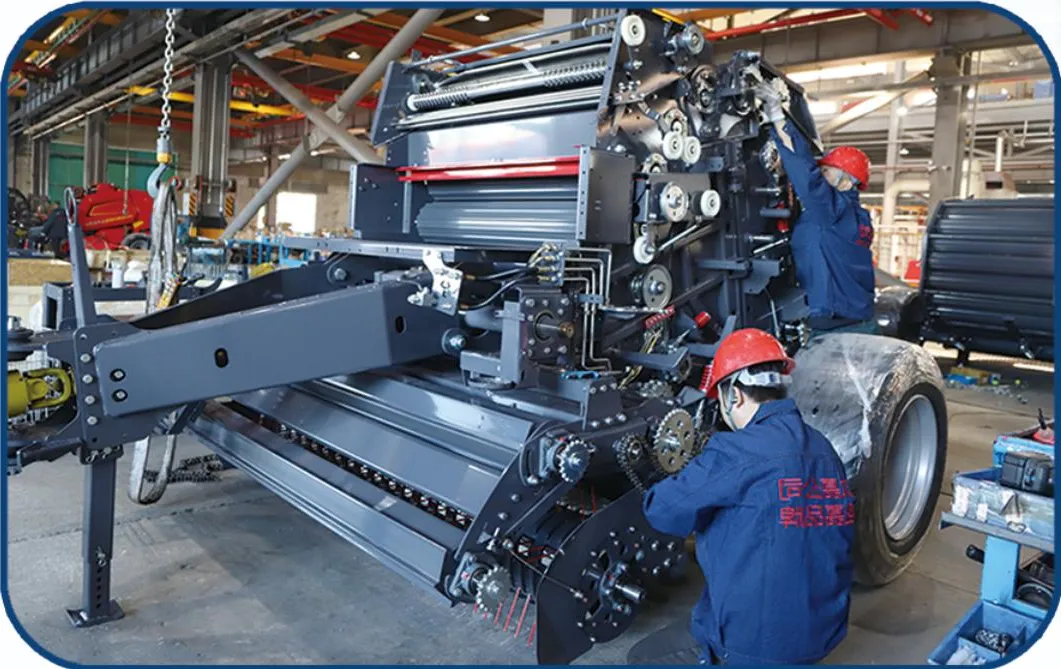
El mantenimiento previo a la temporada es la fase más importante de las tres: es cuando se dispone de tiempo, iluminación y acceso que las condiciones del campo rara vez ofrecen. Dedique medio día completo a una inspección exhaustiva de la empacadora de ensilaje antes de la temporada; intentar comprimirla en 30 minutos suele implicar que se pasen por alto los detalles más importantes. El objetivo es identificar cada componente desgastado, corroído o próximo a su reemplazo, y solucionarlo antes del primer corte, en lugar de durante el mismo. Las fallas de componentes durante el período de corte cuestan mucho más en pérdidas de cosecha y problemas logísticos que la misma reparación realizada en el cobertizo dos semanas antes.
Sistema de recogida de equipos. Controles de pretemporada.
🔩 Púas de recogida
Coloque todas las púas una al lado de la otra; reemplace el juego completo si alguna muestra un desgaste superior a 80% de su longitud original. Inspeccione si hay grietas por tensión en la base donde las púas se unen a las barras del carrete.
⚙️ Seguimiento de cámara
Mida el ancho de la ranura de la leva en la zona de liberación. Reemplace la pieza si excede la tolerancia de desgaste del fabricante. Gire manualmente el carrete y verifique que la retracción de las púas sea suave y uniforme en todas las posiciones.
🔗 Cadena de transmisión de la camioneta
Mida el alargamiento de la cadena con un medidor de desgaste. Reemplácela cuando alcance un alargamiento de 3%. Revise los dientes de los piñones para detectar desgaste en forma de gancho, lo que indica que la cadena se usó durante demasiado tiempo en esos piñones.
🛞 Rodamientos del eje del carrete
Empuje lateralmente el eje del carrete de recogida; reemplace los rodamientos si el juego lateral supera los 2 mm. Compruebe si hay aspereza o ruido girándolo lentamente con la mano después de limpiarlo.
Revisiones de pretemporada de Belt & Chamber
🔗 Estado del conjunto de cinturones
Inspeccione todas las correas para detectar grietas superficiales, brillo excesivo, exposición del cordón o deshilachamiento en los bordes. Reemplace el juego completo si alguna correa presenta alguno de estos signos; nunca mezcle correas viejas con nuevas.
⭕ Rodillos de accionamiento
Gire cada rodillo a mano; reemplácelo si nota aspereza o atasco. Mida el diámetro del rodillo en tres puntos; una variación superior a 2 mm indica un desgaste irregular que requiere su reemplazo.
🔧 Muelles tensores
Mida la longitud libre del resorte tensor según las especificaciones. Reemplácelo si está acortado más de 10%; un resorte debilitado proporciona una tensión insuficiente a la correa bajo cargas de pacas de ensilaje, independientemente de la posición de ajuste.
📐 Paneles laterales de la cámara
Inspeccione los paneles fijos de la cámara para detectar cualquier deformación, grieta o corrosión que pueda alterar la geometría de la paca. Verifique que los pasadores y pestillos de las bisagras de la compuerta trasera no tengan holgura; los pestillos desgastados provocan una presión inconsistente en la cámara durante la eyección.
Controles de pretemporada del sistema de nudos/encuadernación
🔩 Perfil de Bill Hook
Compare el perfil de la punta con el de un anzuelo nuevo; reemplácelo si el radio de la punta ha aumentado visiblemente debido al desgaste. Verifique la holgura entre el anzuelo y el disco de hilo con un calibrador de espesores y ajústela según las especificaciones.
🔪 Cuchillo para anudar
Como parte del mantenimiento preventivo antes de la temporada, reemplace la cuchilla, ya que la corrosión durante el invierno la desafila. Después de instalar la cuchilla nueva, ajuste la holgura entre la cuchilla y el disco a 0,2–0,5 mm con un calibrador de espesores.
📏 Sincronización de agujas
Gire manualmente el mecanismo de anudado y verifique que la punta de la aguja llegue a la zona de captura del gancho en la posición de rotación correcta. Ajuste si la sincronización se ha desajustado debido al estiramiento de la cadena o al movimiento de servicio.
🌀 Cámara de strippers
Mida el espesor de la leva y compárelo con la especificación de desgaste. Verifique la sincronización del contacto de la leva en el ciclo de rotación. Una leva desgastada por debajo de la especificación producirá nudos flojos de forma constante, independientemente del ajuste del tensor.
Revisiones de pretemporada del sistema de transmisión y hidráulico de la toma de fuerza (PTO)
⚡ Pernos de corte
Sustituya el juego completo de pernos de corte por pernos del grado especificado por el fabricante al comienzo de cada temporada, independientemente de su estado. Lleve al menos 10 repuestos en la caja de herramientas de campo.
🔗 Eje de la toma de fuerza
Inspeccione los tubos del eje telescópico para detectar atascos o corrosión que impidan su extensión completa. Verifique la holgura de la junta universal: más de 2-3° de movimiento libre indica desgaste en las crucetas. Engrase todos los racores antes de la temporada.
🛢️ Sistema hidráulico
Compruebe el nivel y el color del líquido hidráulico. Inspeccione todas las mangueras para detectar grietas, fugas o corrosión en las conexiones. Reemplace cualquier manguera que presente grietas externas; el trabajo con ensilaje implica una flexión considerable de las mangueras que acelera la fatiga interna.
🔩 Aceite para la caja de cambios
Compruebe los niveles de aceite de la caja de cambios principal y de cualquier caja de cambios secundaria. Inspeccione los tapones de drenaje y las juntas de la caja de cambios para detectar posibles fugas. Cambie el aceite si la máquina ha superado el intervalo de cambio recomendado por el fabricante en horas.
Mantenimiento durante la temporada: Tareas diarias durante las campañas activas
Lo que debe suceder cada día de operación sin excepción.
El mantenimiento diario durante la temporada es la disciplina que diferencia a los operadores que pierden medio día de corte por una falla evitable de aquellos que completan la campaña a tiempo. Las siguientes tareas toman de 20 a 30 minutos al final de cada día de operación y deben completarse mientras la máquina aún sea accesible, no la mañana anterior a la siguiente sesión, cuando descubrir un problema significa un inicio retrasado. Para los operadores australianos que operan empacadora de ensilaje para granja lechera En operaciones con periodos de cosecha muy ajustados, la rutina diaria es innegociable.
| Tarea diaria | Por qué es importante en el ensilaje | Qué buscar |
|---|---|---|
| Engrase todos los puntos de lubricación marcados. | El jugo de las plantas limpia la grasa de los sellos de los cojinetes más rápido que en condiciones secas. | Resistencia en cada punto: las conexiones secas indican un conducto bloqueado que necesita limpieza. |
| Limpie las correas y los rodillos de transmisión. | Los residuos de ensilaje reducen la fricción de la cinta transportadora y se endurecen si se dejan durante la noche. | Se observa vitrificación de la superficie de la correa, agrietamiento visible o desgaste en los bordes. |
| Inspeccione las púas de recogida. | Los impactos de piedras durante el día pueden doblar las púas sin que se note durante el funcionamiento. | Si alguna púa está doblada, agrietada o falta, reemplácela antes de la próxima sesión. |
| Inspeccione el eje de recogida para detectar posibles enredos. | Los tallos de ensilaje y los fragmentos de cuerda se envuelven progresivamente en el eje. | Cualquier acumulación de cultivos o enredos: retírela antes de que se vuelva densa. |
| Limpiar el conjunto del anudador | Los residuos de ensilaje endurecen los puntos de pivote y modifican las holguras durante la noche. | Residuos en la podadera, las guías del cordel y el cuchillo: limpiar con aire comprimido. |
| Aplique inhibidor de corrosión al anudador. | El entorno del ensilaje corroe los picos y cuchillos sin protección durante la noche. | Capa ligera en la superficie del pico, el filo del cuchillo y el disco. |
| Compruebe el líquido hidráulico y las mangueras. | El sistema hidráulico de la compuerta trasera trabaja duro en el ensilaje; las fugas se desarrollan rápidamente bajo carga. | Cualquier fuga en los racores de las mangueras o en los sellos de los cilindros debe solucionarse antes de la próxima sesión. |
Mantenimiento durante la temporada: revisiones semanales
Inspecciones más exhaustivas que detectan problemas que el control diario pasa por alto.
Las revisiones semanales constituyen la defensa intermedia contra el desgaste progresivo que la inspección diaria no detecta, ya que se desarrolla demasiado lentamente para ser visible entre sesiones individuales. Los cambios en la tensión de la correa, el alargamiento de la cadena y el desgaste de los cojinetes se desarrollan a lo largo de días, no de horas; la revisión semanal está calibrada para detectarlos cuando la corrección aún es sencilla. Para operaciones con múltiples cortes en intervalos cortos, sustituya "semanalmente" por "cada 30-40 horas de operación" como intervalo de activación más preciso.
Comprobación de la tensión de la correa
Compruebe la deflexión en el punto medio de todas las correas. Vuelva a tensar cualquier correa que se deforme más allá de la especificación. Inspeccione los bordes de las correas para detectar desgaste por fricción contra las bridas de los rodillos.
Tensión y estado de la cadena
Compruebe la tensión de todas las cadenas de transmisión: la cadena de recogida, la cadena de empuje y la cadena de transmisión del anudador. Preste atención al ruido de golpeteo de la cadena durante la siguiente sesión de funcionamiento tras el ajuste para confirmar que se ha corregido.
Comprobación del rodamiento de rodillos
Haga girar cada rodillo de transmisión a mano; cualquier aspereza o rigidez que no estuviera presente antes de la temporada indica un deterioro del rodamiento que debe solucionarse antes del próximo corte.
Espacios libres para anudadores
Compruebe la holgura entre el gancho y el disco, así como entre la cuchilla y el disco, utilizando galgas de espesores. La acumulación de residuos de ensilaje puede alterar estas holguras entre las revisiones semanales; ajústelas de nuevo si están fuera de especificación.
Nivel de aceite de la caja de cambios
Compruebe semanalmente los niveles de aceite de la caja de cambios principal y secundaria; una pequeña fuga en un sello que no activaría una revisión visual diaria puede reducir el nivel lo suficiente como para causar daños por calor en el plazo de una semana de funcionamiento.
Comprobación del par de apriete de los sujetadores
Verifique el par de apriete de los elementos de fijación críticos: pernos de montaje del carrete de recogida, pernos de la carcasa del rodamiento y herrajes de montaje del pestillo de la puerta trasera. La vibración del ensilaje afloja los elementos de fijación más rápidamente que el transporte de heno seco.

Lista de verificación posterior a la temporada: Preparación del almacenamiento al final de la campaña
Protección de la máquina durante el período de descanso
El mantenimiento posterior a la temporada es la fase que con mayor frecuencia se omite: se realiza el último corte, el tractor se necesita para otras tareas y la empacadora regresa al cobertizo con los residuos de ensilaje acumulados el último día. Este es el error de mantenimiento más costoso que puede cometer un operador. Los residuos de ensilaje que quedan en la máquina durante la temporada baja actúan como un agente corrosivo continuo: los ácidos vegetales presentes en los residuos secos siguen atacando las superficies metálicas, los compuestos de caucho y los sellos de los cojinetes durante todo el período de almacenamiento. Una máquina almacenada correctamente requiere la mitad del esfuerzo para prepararse para la siguiente temporada; una almacenada sucia puede requerir el reemplazo de componentes antes de la temporada, algo que un cuidado adecuado posterior a la temporada habría evitado.
Secuencia de limpieza posterior a la temporada
Lave a presión toda la máquina.
Utilice una hidrolavadora para limpiar toda la empacadora: correas, rodillos, conjunto del anudador, recolector, interior de la cámara y transmisión. Deje que la máquina se seque por completo antes de lubricarla; aplicar grasa sobre superficies húmedas retiene la humedad.
Engrase completamente todos los puntos de lubricación.
Tras el secado, engrase todos los puntos de lubricación marcados hasta que salga grasa fresca del sello. El objetivo es eliminar cualquier humedad residual de las cavidades del rodamiento y crear una película de grasa completa para el período de almacenamiento.
Aplique protección anticorrosión al metal expuesto.
Rocíe la horquilla, la cuchilla, el disco de hilo, las púas de recogida y todas las superficies de los rodillos con un spray anticorrosivo. Preste especial atención al interior de la cámara de empacado, donde el contacto con los residuos es mayor.
Aliviar la tensión de la correa para su almacenamiento
Afloje los tensores de la correa para reducir la tensión a casi cero durante el período de almacenamiento. Una tensión sostenida durante el almacenamiento provoca la deformación plástica del caucho de la correa, lo que reduce permanentemente su elasticidad efectiva. Vuelva a tensarla según las especificaciones de funcionamiento antes de la siguiente revisión de pretemporada.
Documentar todas las observaciones sobre el desgaste.
Registre cualquier componente que se acerque a su límite de desgaste, cualquier falla repetida durante la temporada y cualquier ajuste que haya sido necesario más de una vez. Esta lista servirá como punto de partida para la próxima inspección de pretemporada, asegurando que nada de lo detectado esta temporada se olvide antes del próximo año.
Lista de verificación maestra de mantenimiento de un vistazo
Imprima y guarde en la caja de herramientas de campo.
| Tarea | A diario | Semanalmente | Pretemporada | Postemporada |
|---|---|---|---|---|
| Engrase todos los puntos de lubricación. | ✓ | ✓ | ✓ | |
| Limpie las correas y los rodillos de transmisión. | ✓ | ✓ | ||
| Inspeccione las púas de recogida. | ✓ | ✓ | ||
| Limpiar el conjunto del anudador | ✓ | ✓ | ||
| Inspeccione el eje para detectar posibles enredos de la cosecha. | ✓ | |||
| Compruebe la tensión de la correa. | ✓ | ✓ | ||
| Compruebe/ajuste la tensión de la cadena de transmisión. | ✓ | ✓ | ||
| Gire los rodamientos de rodillos a mano | ✓ | ✓ | ||
| Verificación de holgura del anudador | ✓ | ✓ | ||
| Sustituir los pernos de seguridad (juego completo) | ✓ | |||
| Reemplazar la cuchilla anudadora | ✓ | |||
| Aliviar la tensión de la correa para su almacenamiento | ✓ | |||
| Aplique protección anticorrosión a todos los metales. | ✓ |
Repuestos que conviene tener a mano durante la temporada de ensilaje.
Kit mínimo de repuestos de campo para operaciones de ensilaje en Australia
La diferencia entre una reparación de campo de 10 minutos y una demora de dos horas esperando una entrega de repuestos radica casi siempre en si la pieza de repuesto correcta está en la caja de herramientas del tractor. La siguiente lista representa el kit mínimo recomendado de repuestos de campo para cualquier máquina empacadora de ensilaje durante una campaña activa. Para obtener listas de piezas y disponibilidad específicas del modelo, Contacta con nuestro equipo de la zona industrial de Charlton. — Disponemos de componentes para toda la gama Ever-power.
🔩 Pernos de corte (×10, calidad OEM)
Reemplazar después de cada obstrucción que detenga el rotor. Nunca sustituir pernos por otros de mayor calidad.
🔩 Dientes de recogida (×6, a juego con el modelo)
Los golpes de piedra durante el día provocan que las púas necesiten ser reemplazadas en la misma sesión.
🔪 Cuchillo anudador (×1 de repuesto)
Un cuchillo que se desafila por la suciedad durante la sesión se puede cambiar inmediatamente en lugar de terminar el día con un mal atado.
🛢️ Pistola de engrase + grasa apta para ensilaje
Vuelva a lubricar cualquier cojinete que se haya sobrecalentado o que haya quedado expuesto después de una limpieza para eliminar una obstrucción.
✂️ Cortadores de alambre de alta resistencia
Retire el cable de campo y el cordel viejo del eje de la pastilla antes de que se enreden y causen daños secundarios.
💧 Medidor de humedad del forraje
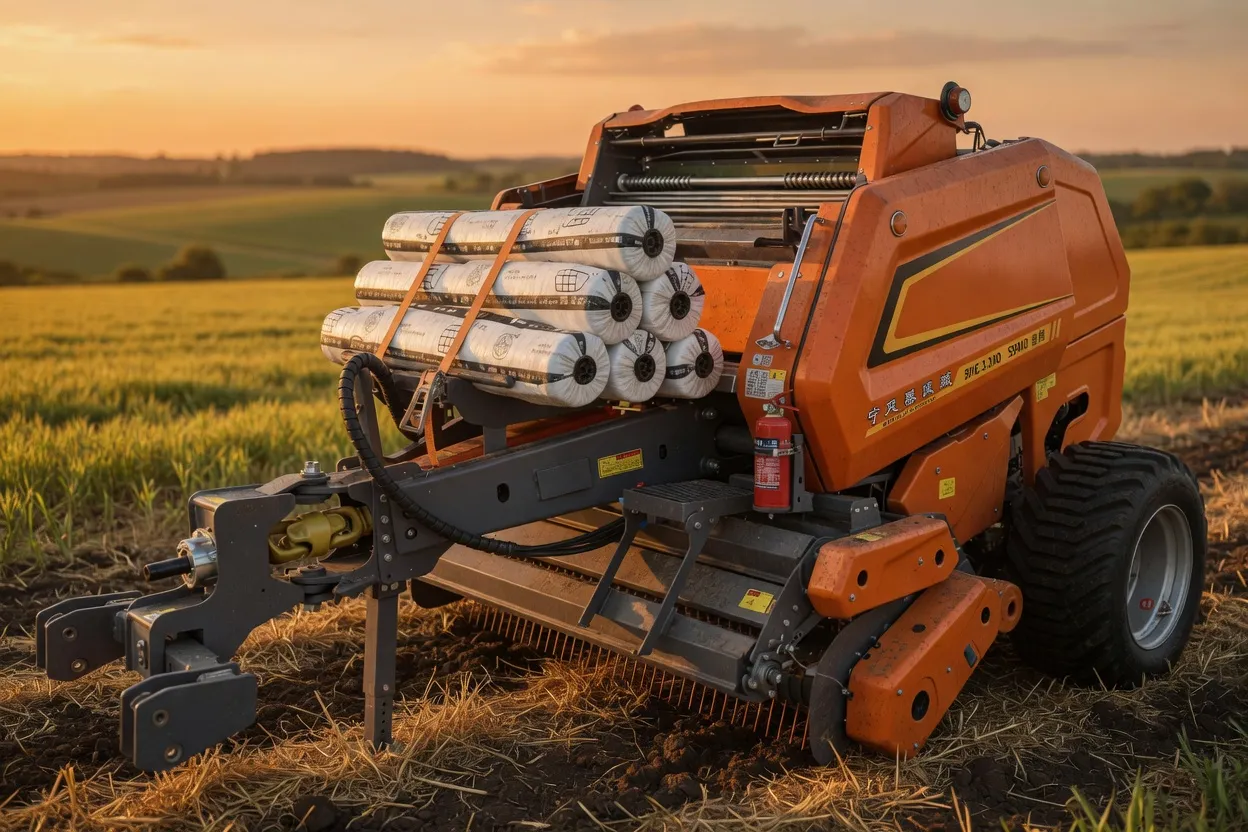
Antes de comenzar, confirme que la humedad se encuentra dentro del rango de empacado de 50–65%; este es el elemento de mantenimiento más económico de la lista.
Ever-Power: Diseñado para ser mantenido, no solo operado.
La facilidad de mantenimiento como requisito de diseño, no como algo secundario.

Al evaluar un Empacadora de ensilaje en venta En Australia, la facilidad de mantenimiento es tan importante como las especificaciones de rendimiento iniciales. Las máquinas Ever-Power están diseñadas con el acceso para el mantenimiento como requisito fundamental: los puntos de lubricación están ubicados en lugares accesibles con una pistola de engrase en el campo sin necesidad de desmontar la máquina, los paneles de inspección permiten el acceso visual a los componentes de mayor desgaste sin desmontar los conjuntos principales, y el mecanismo de anudado es accesible desde un único punto para la secuencia completa de ajuste. Para los operadores australianos que trabajan sin un taller de distribución cercano, este enfoque de diseño se traduce directamente en la capacidad de realizar un mantenimiento completo en la explotación agrícola, en lugar de requerir la asistencia de un especialista para las tareas de servicio rutinarias. Puede encontrar información completa sobre el producto y el soporte en nuestra página web. Página Acerca de nosotros.
Puntos de lubricación accesibles en campo
Todos los puntos de lubricación marcados son accesibles con una pistola de engrase estándar sin necesidad de retirar protecciones ni paneles.
Acceso mediante nudo de un solo punto
La secuencia completa de ajuste del anudador es accesible desde un único panel de inspección, sin necesidad de desmontaje parcial.
Stock de repuestos australianos
Repuestos disponibles localmente Para todos los modelos, sin largos plazos de entrega para la importación cuando los necesite durante la temporada.
Documentación completa del operador
Se proporcionan programas de mantenimiento completos y especificaciones de ajuste con cada máquina; no hay que adivinar los intervalos ni las tolerancias.
¿Necesita repuestos o asesoramiento sobre mantenimiento?
Hable con nuestro equipo de soporte para empacadoras de ensilaje.
Zona Industrial de Charlton, Australia: suministro de repuestos, asesoramiento sobre mantenimiento y asistencia técnica para todos los modelos de Ever-power.
Preguntas frecuentes
Preguntas frecuentes sobre el mantenimiento estacional de las empacadoras de ensilaje
![]()
Australia Ever-power Forage Balers Co., Ltd.
📍 Zona industrial de Charlton, Australia


